Configuring a Reverse Proxy on an Apache VPS Server
In the world of web hosting and server management, the VPS server has emerged as a versatile and reliable solution. If you happen to operate a VPS server netherlands, like the one offered by Vsys.Host, and are looking to optimize your server setup for enhanced performance and security, one crucial technique to consider is configuring a reverse proxy using Apache.
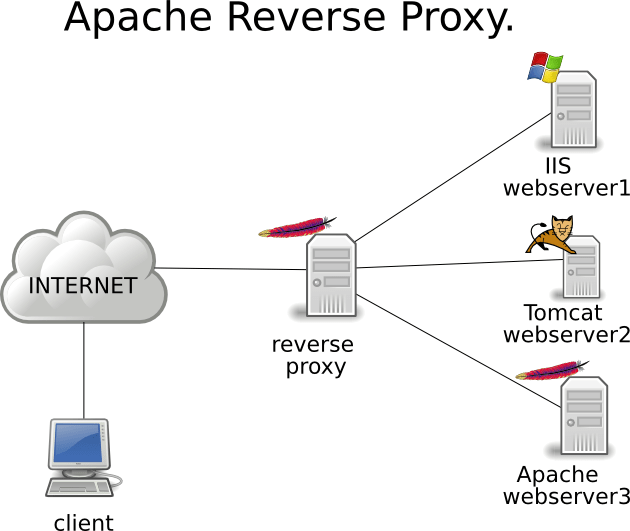
A server that lies between client devices and a web server is referred to as a reverse proxy. This type of server is responsible for transmitting client requests to the web server and then returning the server’s responses to the clients. It is capable of performing a wide variety of functions, including SSL termination, load balancing, and even content caching. This tutorial will take you step-by-step through the process of installing a reverse proxy on your Apache VPS server so that you may take advantage of its many advantages, including increased website speed and protection against cyberattacks.
Step 1: Installing Apache
If Apache isn’t already installed on your VPS server, you’ll need to do so. You can use the package manager specific to your Linux distribution to install Apache. For example, on Debian/Ubuntu, you can use the following command:
sudo apt update
sudo apt install apache2
Step 2: Enabling the Required Modules
To configure a reverse proxy, you’ll need to enable certain Apache modules. Execute the following commands:
sudo a2enmod proxy
sudo a2enmod proxy_http
sudo systemctl restart apache2
Step 3: Creating a Virtual Host Configuration
Create a new virtual host configuration file for your website. You can do this by creating a new .conf file in the /etc/apache2/sites-available/ directory and configuring it as follows:
<VirtualHost *:80>
ServerName yourdomain.com
ServerAlias www.yourdomain.com
ProxyPass / http://your-backend-server-url/
ProxyPassReverse / http://your-backend-server-url/
ErrorLog ${APACHE_LOG_DIR}/error.log
CustomLog ${APACHE_LOG_DIR}/access.log combined
</VirtualHost>
Replace yourdomain.com with your actual domain and your-backend-server-url with the URL of your AMD VPS server.
Step 4: Enabling the Virtual Host and Restarting Apache
Enable the virtual host configuration and restart Apache:
sudo a2ensite yourdomain.com.conf
sudo systemctl restart apache2
At this point, your reverse proxy should be properly configured and ready for use. Your AMD Virtual Private Server will act as a proxy for all incoming traffic to your domain, which will improve the level of security and may also improve performance.
By following these steps and harnessing the power of your VPS server in the Netherlands, you can effectively configure a reverse proxy using Apache to optimize your website’s performance and security. This setup will ensure that your web applications run smoothly and securely for your users.